Before I bought my meat grinders, I’ve had been using a KitchenAid Meat Grinder attachment with a stand mixer for grinding meat for years, and I have used it many times to grind the perfect hamburger meat.
Grinding hamburger meat with a KitchenAid meat grinder is similar to as you would with a regular meat grinder, but there are a few steps to follow to ensure you get the best results.
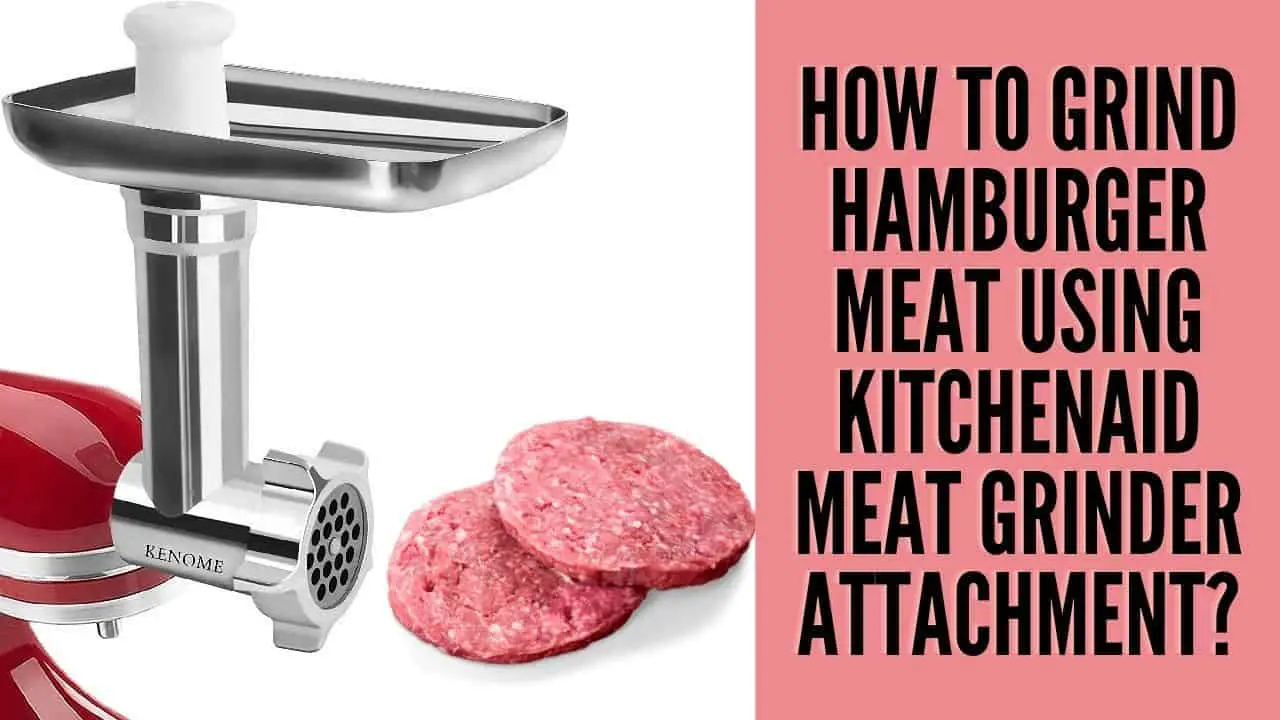
Table of Contents
Which KitchenAid Meat Grinder Attachment would be Best for Grinding Hamburger Meat and Why?
There are several different KitchenAid meat grinder attachments to use for grinding hamburger meat, but the GVODE meat grinder attachment wins the gold, and here’s why!
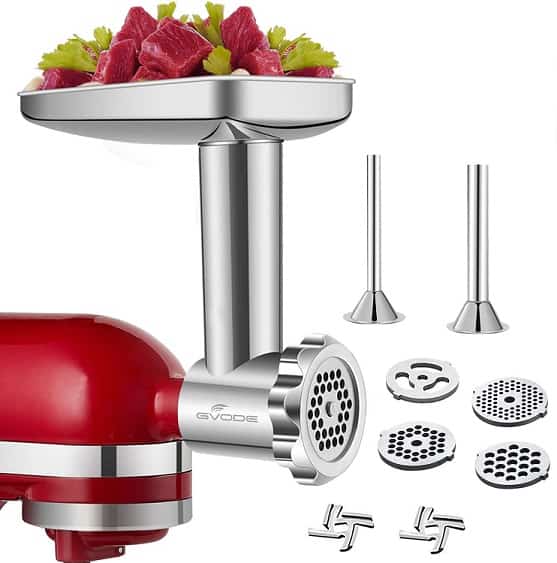
The GVODE meat grinder attachment is crafted entirely of premium quality stainless steel, so it will serve you well for many years to come with proper care.
It is a great choice for grinding meat, fruits, vegetables, and also does a good job at grating cheese and making dough bread.
The GVODE KitchenAid meat grinder attachment is designed especially for KitchenAid stand mixers, and comes with everything you need to get started right out of the box including two grinding blades, four grinding plates, and two sausage stuffing tubes.
It features a polished mirror surface that’s easy to clean, and dishwasher safe parts.
How to Grind Hamburger Meat Using KitchenAid Meat Grinder Attachment?
There are several things you will need to grind hamburger meat with a KitchenAid meat grinder attachment including:
What will you need for the grinding process?
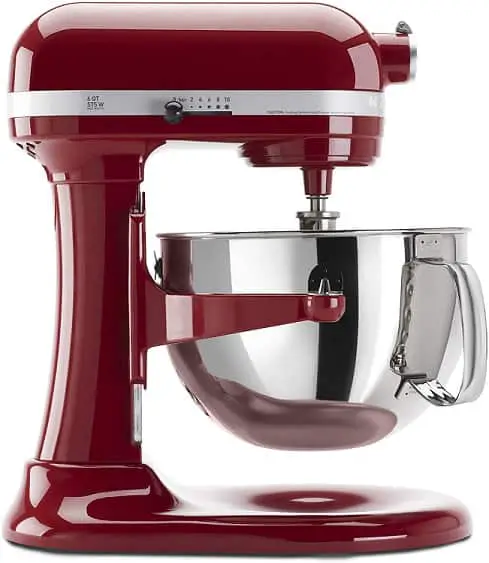
1. KitchenAid Professional 600 Series Stand Mixer
A KitchenAid stand mixer is the most essential appliance to run the KitchenAid meat grinder attachments.
It is worth mentioning that there are several imitation KitchenAid meat grinders to steer clear of because they aren’t designed to work with KitchenAid meat grinder attachments.
On a brighter note, some models such as the HAUSWIRT 3-IN-1 Stand Mixer do perform well when it comes to grinding, thanks to a powerful 550-watt motor.
KitchenAid Professional 600 Series stand mixer is an original model from the manufacturer, and can be ordered in an assortment of exciting colors.
It features a patented power hub that allows you to connect over 12 different attachments to grind hamburger meat or shred a block of parmesan cheese.
This KitchenAid stand mixer model does come with a six-quart stainless steel bowl that is topped with a comfortable handle. This bowl has enough capacity to mix dough for 13 dozen cookies, 8 loaves of bread, or 8 lbs of mash potatoes at one time.
The KitchenAid Professional 600 Series stand mixer offers 10 speed settings to choose from, giving you complete control over your grinds. It comes with a Powerknead spiral dough hook, flat beater, and stainless-steel wire whip.
2. KitchenAid Meat Grinder Attachment
You can use the above-recommended GVODE meat grinder attachment or another one of my favorites and original— KitchenAid KSMMGA metal meat grinder.
This model is designed, engineered and tested by KitchenAid, and features a convenient front pocket, and large food tray to grind more meat at a time.
3. Ground Beef
You can buy readymade ground beef at your local butchers, but you’re not guaranteed freshness, that’s why we’re here!
The most common meat to grind for burgers is chuck for several reasons, most notably because it is marbled throughout, well-balanced in flavor, and provides a great fat-to-lean ratio.
4. Sharp Knife
You will need a really sharp knife to cut beef chuck into smaller pieces, before putting them into the meat grinder tray.
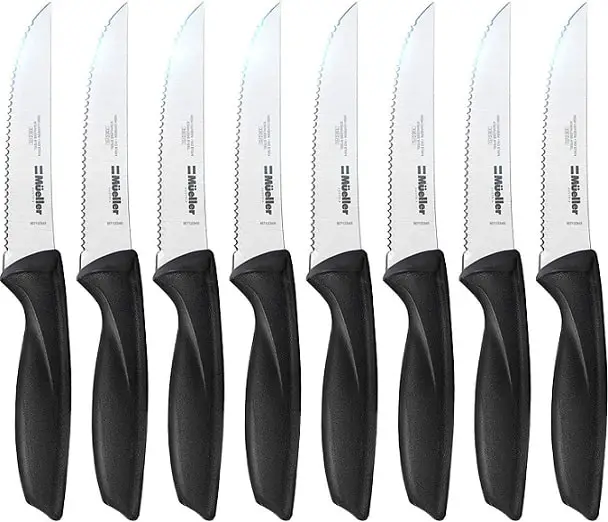
The Mueller steak knife set come with eight knives, and feature a super sharp, serrated stainless steel blades. Further, the Mueller steak knife boasts an ergonomic design to minimize any fatigue, and arrives complete with secure, comfortable grip handles.
5. Large bowl
A large bowl will prove handy for storing the chopped pieces of beef in your refrigerator or freezer. If you don’t have a bowl, the ZYER oval-shaped bowl is a great option, as it’s crafted from tempered glass, so won’t crack or shatter.
6. Food Pusher

Most of the best KitchenAid meat grinder attachments come with a food pusher to easily send the meat through the grinder head. If your model didn’t come with one, you can buy one separately at an affordable price.
7. Grinder Plates
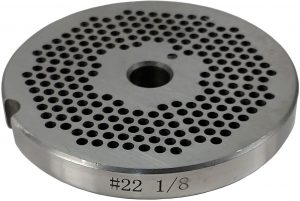
Grinder plates are yet another accessory often included with KitchenAid meat grinder attachments, and dictate the texture of the grind—fine, coarse or medium.
Preparing the Meat for Grinding
There are several things you need to do to prepare the meat before processing it with a KitchenAid meat grinder attachment.
1. Chop the meat into smaller pieces
First, the most important thing to do is chop the beef up into small one-inch or so cubes. Doing this will make it easier for the meat grinder to process the meat.
2. Chill the meat and parts of the grinder
Chilling the meat and certain KitchenAid meat grinder parts in your refrigerator or freezer for half an hour or so at the minimum will help the meat hold itself better, and go through the grinder much more easily.
The KitchenAid meat grinder parts to chill are the blades, grinding plates, shaft, tube, plate, die, and screw.
3. Start grinding
Once chilled, remove the meat and grinder parts from your refrigerator, and assemble the grinder attachment.
Do not leave the meat out on the countertop at room temperature before grinding, as this may cause bacterial contamination.
4. Grind the meat twice
It’s a good practice to run the meat twice through the KitchenAid meat grinder attachment—first with a coarse grinding plate, and second with a fine grinder plate.
Running the meat through the two different size meat grinder plates will give the burger meat the perfect texture, which is especially important if you’re cooking smashed burgers or on the barbeque.
Setting up the KitchenAid Mixer with the Meat Grinder Attachment
Assembling and using a KitchenAid meat grinder attachment is pretty much a no-brainer, where you start by:
Assembling the meat grinder attachment
- Grab the grind screw, and insert it into the main housing of the KitchenAid meat grinder attachment.
- Next, place the blade of the KitchenAid meat grinder attachment over the tip of the grind screw.
- Take note that the blade should fit perfectly into the housing, but if it doesn’t, you will have to remove it, flip it over, and set it in place again.
- After you’ve placed the blade in the right position, get your desired grinding plate, and set it over the blade, making sure that the notch of the plate matches the tab at the bottom of the main housing.
- To secure the grinder head with the grinder plate and blade, tighten the collar on the main housing, and voila—you’re ready to grind.
Tips for Grinding Hamburger Meat using KitchenAid
- The best formula for selecting the right meat is 85 percent chuck and 15 percent sirloin. However, these numbers aren’t etched in stone, and you can make adjustments according to your taste.
- You also need to pay attention to the beef-to-fat ratio, which ideally should be 25 percent fat. Determining the exact fat ratio in your meat can be tricky, so you will just have to eyeball it by literally looking at it.
- With regards to flavor, it depends on what your taste buds call for, but some seasoned grillers even use mix short ribs, and other cuts in their blends. But the bottom line is that you need two things—flavor and fat, which you can easily achieve from chuck and sirloin.
- When you go to your butcher, ask for three quarters of a pound chuck, and a quarter pound sirloin for a total of a pound of raw meat. Then the big secret is to ask for beef trimmings that will serve as the fat content.
- Once you have your blend, do not separate anything, but grind everything together.
- When creating the burger patties, be gentle and don’t add too much pressure, and pack them too much.
- Another neat trick is to make a dent in the middle of each burger patty with your thumb, so that it comes back to its natural shape when it cooks, rather than swelling up like a soccer ball when put on the grill. You can get the burger back in shape after it’s cooked using a spatula or similar cooking tool.