Meat grinders are extremely handy appliances to have in kitchens big or small. If you already own a meat grinder, this is a statement you will definitely agree with.

These meat grinding devices come with several different components including the head and blade assembly.
After a period of use, you will have to take the meat grinder apart to unclog and clean the grinder for continued optimum performance.
Further, some meat grinders do not come fully assembled right out of the box, but on a brighter note, assembly instructions are pretty much the same across models.
That said, here’s a detailed guide on how to assemble a manual and electric meat grinder the right way.
Table of Contents
How to Assemble an Electric Meat Grinder?
What parts will you need?
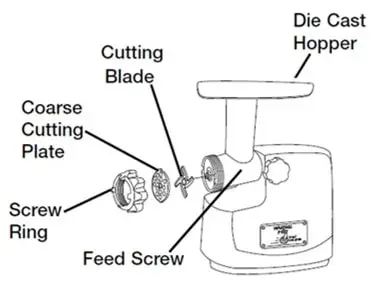
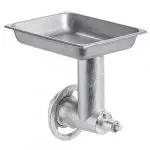
1. Meat tray/Hopper – the meat tray is where you load the meat to be ground.
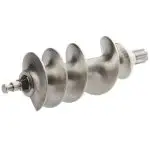
2. Feed screw – the part that is responsible to turn the blade and pushing the meat forward in the grinder.
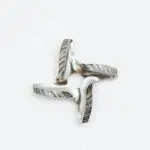
3. Cutting blade – as the name suggests, the cutting blade spins to grind the meat, which is then pushed through the cutting plate.
4. Cutting plate – available in three different variants, the cutting plate decides the texture of the meat when ground starting from coarse to fine.
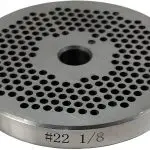
5. Screw Ring – This is used to secure the screw, blade and plate all together.
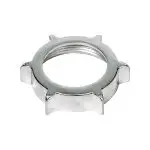
6. Motor housing – this container accommodates the motor of the meat grinder.
7. On/Off reverse switch – powering on and off button, and a reverse switch attached to the meat grinder to unclog the unit.
8. Power cord – attached the meat grinder, but some may be detachable.
How long will the assembly take?
Ideally it should take no more than an hour to assemble an electric meat grinder.
Even though assembling an electric meat grinder doesn’t require any technical expertise, you can speed up the process if you know how to put things together in the right places.
Most of the best electric meat grinder do come with detailed assembly instructions, so there’s a slim chance of error.
Remove all the electric meat grinder parts from the box, and lay them out on a large table or even countertop, so that they are easy to access during assembly.
Steps to assemble an electric meat grinder
First most important thing to do is to make sure that the meat grinder is unplugged before you assemble or dissemble it.
Step 1: Setup the head assembly
Grab the head of the electric meat grinder, and insert the feed screw. Next, insert the cutter blade into the other end of the feed screw.
The cutting blade should be placed with the flat side facing outwards or else the grinder will not work properly.
To complete the head assembly, choose from one of the three cutting plates, and set it at the front, over the cutting blade.
Each cutting plate features a notch, which should be secured tight with the opening on the slot in the housing.
If your grinder head assembly came with a nut, then place it, and turn clockwise to fasten it.
Step 2: Attach the grinder head assembly with the motor unit
After you’ve installed all the parts into the grinder assembly, attach it with the motor unit.
You can do this by fastening the lugs with the appropriate slots on the housing. Both the grinder head assembly and motor unit are now locked into position.
And voila — your electric meat grinder is fully assembled and ready for mincing.
Tips for avoiding mistakes
- Remove all the parts from the box when your meat grinder arrives. Remember, there are really small parts that are highly important for the assembly process such as lugs and nuts.
- Place all the parts together on an open area, so that you have easy access to them during installation.
- Whether you’re using the meat grinder for the first time or not, you should clean the parts with a clean, damp cloth to get rid of any dust and stuck meat in the grinder components.
How to Assemble a Manual Meat Grinder?
Even though a manual meat grinder has fewer parts than an electric model, the assembly process can be a bit complex if you don’t have a clue what you’re doing.
What parts will you need?
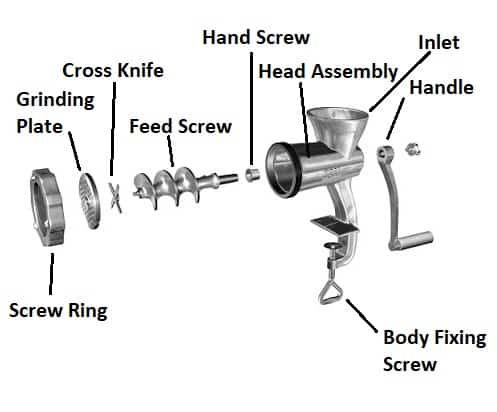
1. Hand screw – this is the part that turns the transfer shaft inside the grinder head assembly.
2. Handle – the handle connects with the hand screw, and is the part that you hold on to and turn to grind meat.
3. Inlet – similar to the food tray of an electric meat grinder, the inlet is where you load the meat to be ground.
4. Grinder head assembly – this component is equipped with the components that do the hard work of grinding such as transfer shaft, cross knife, spindle head, grinding plate and ring nut.
5. Feed Screw – This screw pushes the feeds the meat to the cross knife/blade by pushing it forward.
6. Cross knife – also referred to as the grinder blade, the cross knife grinds the meat as you turn the handle.
7. Grinding plate – just like their electric counterparts, manual meat grinders come with three grinding plate to grind fine, medium and coarse textures of meat.
8. Screw Ring – This ring holds the feed screw, grinder blade and the grinder plate together within the head assembly.
9. Body fixing screw – since manual meat grinders aren’t motor powered units, you will have to attach the body fixing screw to a countertop, so that the grinder doesn’t move while you turn the handle.
How long will the assembly take?
Assembling a manual met grinder is a no-brainer, and should take no more than half hour. It may take a bit longer that 30 minutes if it’s new right out of the box, as you will have to figure out the right placement of the parts.
Steps to assemble an electric meat grinder
Step 1: Setup the grinder assembly
Insert the transfer shaft with the spindle head facing outwards, cross knife, grinder plate and ring nut into the body of your manual meat grinder.
Step 2: Attach handle and handle screw
After you’ve completed the installation of the grinder head, attach the handle screw first, and then the handle. Make sure both are secured well or else you risk injury when grinding.
Step 3: Fix the manual meat grinder to counter
Attach the body fixing screw with the rest of the unit, and clamp it down generally with screws to your countertop.
Tips for avoiding mistakes
- Make sure you remove all the parts from the box, and spread over your counter.
- Use only the clamp provided by the manufacturer to attach your manual meat grinder to a flat surface such as a countertop.
- Always clean the meat grinder after you dissemble, and wipe the parts down before assembly.
