I’ve recently been experiencing uneven cooking and drippings on my burners, and after digging a bit deeper into this issue noticed that my heat shield is worn out.
Also referred to as flavorizer bars, heat tents, flame tamers, or briquette trays, heat shields are tucked away neatly above the burners of your gas grill, and disperse heat produced by the burners evenly throughout the grilling surface for even cooking.
The good news is that if your heat shield is missing or worn out, you can make one right in the comfort of your home with materials that you probably have available.
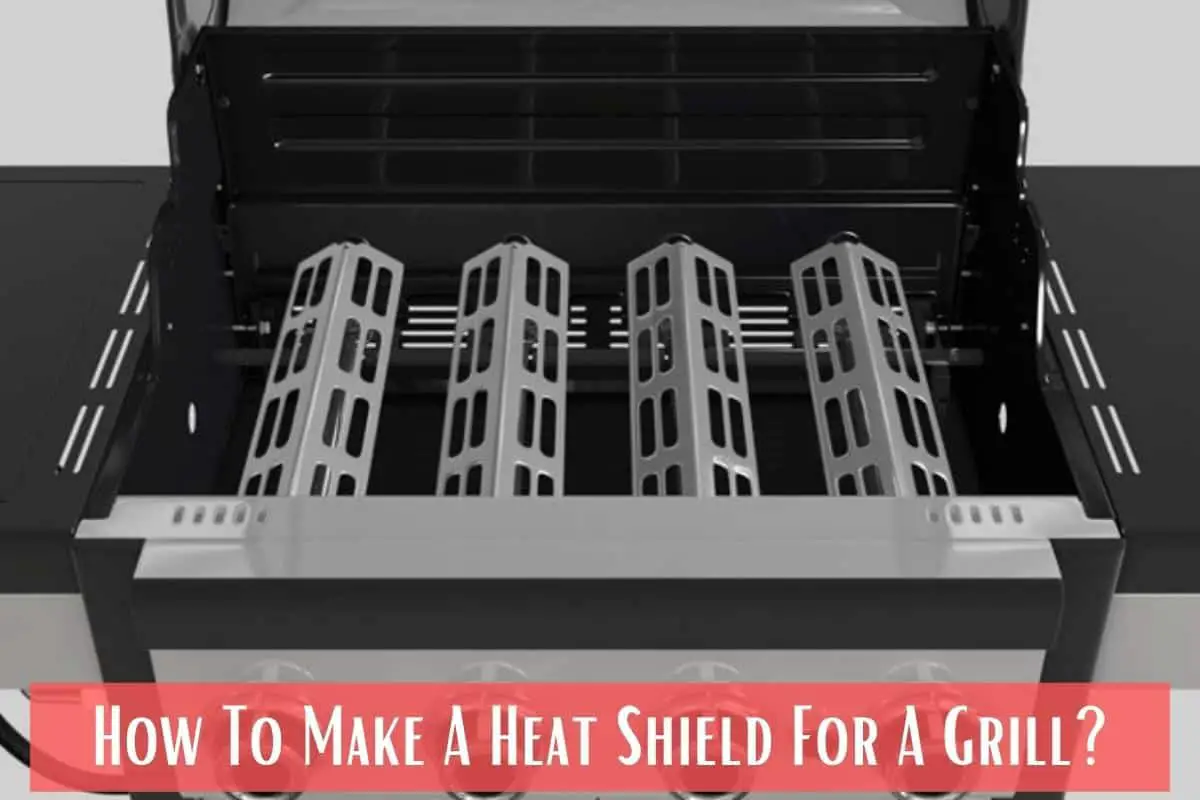
Table of Contents
- 1 What is a Heat Shield for a Grill and Why is it Needed?
- 2 What Materials Can be Used to Make a Homemade Heat Shield?
- 3 What Factors to Consider when Making a Heat Shield for a Grill?
- 4 What are the Characteristics of a Good Heat Shield for a Grill?
- 5 How to Make a Homemade Heat Shield for a Grill?
- 6 Safety Measures to be Aware of When Making a Heat Shield for Grill
- 7 How to Clean a Heat Shield of a Grill?
- 8 How to Maintain a Heat Shield for Maximum Life?
- 9 What are the Advantages of Heat Shield on Grills Over Rocks?
- 10 3 Best Heat Shields
- 11 Final Thoughts
What is a Heat Shield for a Grill and Why is it Needed?
Many grillers aren’t aware that heat shields are one of the most critical components of a gas grill. They offer twofold benefits—protect the burners from food debris and grease, and distribute heat evenly across the grill’s surface.
Older grills come with lava rocks, newer grills with heat shields, and top-of-the-line grills with robust ceramic briquette systems.
While lava rocks do a good job at absorbing heat, their porous nature allows grease and food droppings to leak on the grill’s burners.
This grease and food accumulation results in several issues like being impossible to clean, possible food contamination, flare-ups, and potentially dangerous grease fire conditions.
Heat shields are angled, long strips of metal that stretch across the burner assemblies of your gas grill. The reason they are angled is to direct larger drippings away from the burners and towards the drip pan or grease collection tray.
Heat shields are mostly made from stainless steel owing to this material’s durability and superior ability to retain heat.
What Materials Can be Used to Make a Homemade Heat Shield?
Aluminum is perhaps the best low-cost material to make a heat shield. Furthermore, aluminum is lightweight, easy to work with, and dissipates heat well.
You can also use cast iron coated with porcelain to make a heat shield as these two materials combined are resistive to high heat temperatures.
What Factors to Consider when Making a Heat Shield for a Grill?
There are several important factors to consider when making a heat shield for a grill, most notably:
Stability
Heat shields are designed to resist hot flames, so the first thing to ensure is that the material used in making a heat shield won’t weaken or warp when exposed to high heat.
Heat distribution
Placement of the heat shield is also very important to for even heat distribution.
What are the Characteristics of a Good Heat Shield for a Grill?
The material used to make a heat shield dictates its overall quality. Heat shields can be made from several different materials like stainless steel, cast iron, or porcelain-coat metal.
There are three key attributes that make a good heat shield—should carry flames evenly across the cooking surface, have the ability to retain heat, and be easy to clean.
How to Make a Homemade Heat Shield for a Grill?
What do You Need?
Things you will need to make a homemade heat shield are:
- Corrugated metal
- Stainless-steel, aluminum foil
- Measuring tape
- Hammer
- Stainless steel screw
- Steel cutter
- Circular saw
- Holders
- Drill machine
The Process of Making a Homemade Heat Shield
The process of making a homemade heat shield is a bit complex, and there are several tools needed for the job. You can instead buy a heat shield online (see my recommendations below) or at your local hardware store.
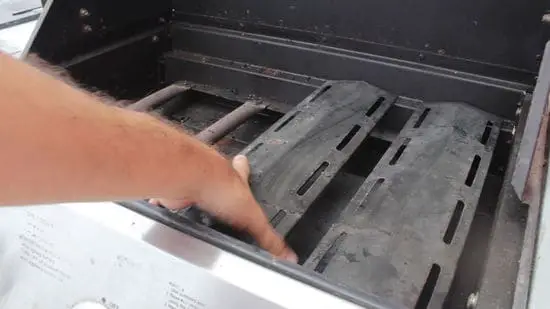
- First, take your grill to an open area to clean it. If you’ve just used your grill, wait for it to cool, and remove the grill plate. You can clean the parts of the grill using vinegar or detergent and freshwater.
- Next, measure the size of your grill’s burner, which is the most important step of the entire process. Remove the heat shield and use a measuring tape and measure around the burner. Remember, you have to measure both the height and width of the burner.
- Now that you’ve taken the proper measurement, it’s time to create the design for the heat shield. You can design the heat shield by creating lines for each burner, and then comparing it with the size of the steel to ensure it fits.
- Cut the steel to match the size with a steel cutter or chop saw. Pay attention, because if you make a mistake when cutting, you will have to discard that piece of steel, and start over with a new piece.
- The steel will be flat when you cut it but we need to achieve an angled shape, which you can do by bending it to the other side.
- You can now install the heat shield in its dedicated position and secure it with the screws.
Safety Measures to be Aware of When Making a Heat Shield for Grill
There are certain precautions to take when making a homemade heat shield for your grill. Since you’re dealing with metal and tools, it’s always a good idea to wear safety gear such as safety glasses and gloves.
Next, get all the materials and tools needed to make a grill shield for a smooth process. When cutting the heat shield, cut it on a parallel, flat surface, and install the shield when the grill is cool.
How to Clean a Heat Shield of a Grill?
Cleaning a heat shield is important this is a part that does accumulate drippings and debris.
It’s easy to clean a heat shield, where you remove the heat shield from the grill, soak in lukewarm water for a couple of hours, scrub it with a sponge to remove the grease and dirt, rinse it with fresh water, wipe it clean, let it air dry, and reinstall the heat shield in the grill.
How to Maintain a Heat Shield for Maximum Life?
The best way to maintain a heat shield for long service life is by cleaning it regularly. When you remove the heat shield from the grill to clean it, check it for signs of wear and tear, and replace if necessary.
What are the Advantages of Heat Shield on Grills Over Rocks?
Some grilling enthusiasts say that heat plates prevent flare-ups compared to lava rocks, and even though this sounds reasonable, you can still experience flare-ups with heat plates but not that frequently.
Heat shields are also less expensive and tend to last longer than rocks, which is an aspect to consider when choosing between heat shields and rocks.
3 Best Heat Shields
1. PETKAO Universal Flame Tamer
The PETKAO heat shield is available in three different colors and can be adjusted to fit most gas grills.

The heat shield is made from sturdy porcelain steel and is easy to fit on your grill. However, you should measure the size of your burners, and buy the size for your grill model.
2. Hisencn Heat Shield 


The Hisencn is available in a pack of three, four, and five, and is made from solid stainless steel.
It is designed for side to side and front to back burners and comes with M5 bolts and wing nuts for the installation process.
3. GasSaf Heat Shield 


The GasSaf heat shield fits most gas grills including Char-Broil and is crafted from heavy-duty porcelain steel.
It is easy to install, is suitable for side to side and front to back burners, and comes with M5 bolts and wing nuts.
Final Thoughts
Making a homemade heat plate requires a fair bit of skill, and is a time-consuming task, which is why you may be better off buying a heat shield from your grill manufacturer to ensure it fits right.
Grill shields usually last roughly six months depending on how much you cook and maintain the shield.