How do I process my wild game? This was the big question I had a couple of years ago after my hunting trip in Ohio, since I had moved away from my regular deer meat processor.
Therefore, I decided to grind deer meat, and to my surprise, the process was quite straightforward as long as you follow the right steps.
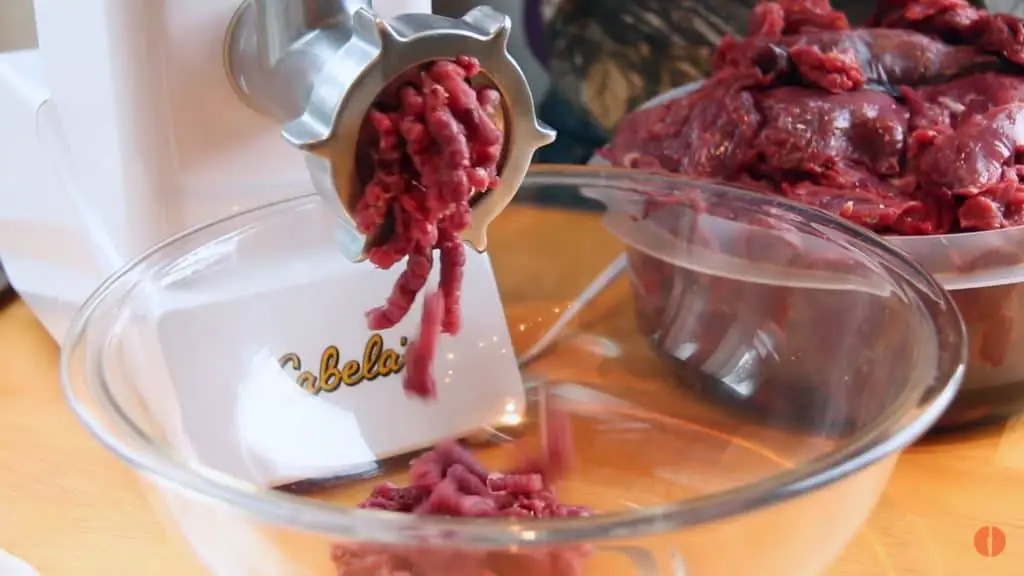
Table of Contents
Why to Grind Deer Meat/Venison?
One of the key reasons to grind deer meat is to save a handsome amount of cash. Most deer meat processors can charge up to $100 per deer, which can quickly add up if you’re hunting more than a couple deer per season, and every year.
It really paid to grind the meat myself, because all I invested in was a powerful meat grinder that will serve me well for many years to come.
Grinding deer at home also gave me more control and flexibility when the cooking time arrives, as I could grind meat for burgers, make venison sausages, and cut steaks and store them in my deep freezer for later consumption.
The last reason to grind deer meat is the gratification of being part of the entire process, right from hunting the deer to turning it into food fit for consumption
What do You Need for Grinding Deer Meat?
Apart from the time it takes to grind deer meat (three to five hours if you’re a beginner), there are a few things you will need to grind deer meat.
The upfront costs for these items are perhaps one of the reasons why many people steer clear of grinding their own deer meat, but they’re well worth it in the long term.
I already had the basics, that is bowls, cooler, fillet knife and cutting board, but what I add to the mix were:
1. Meat grinder
I already own a food processor, which I could’ve used by adding a meat grinder attachment, but I wanted an appliance that could grind a large amount of meat per hour.
I also didn’t want to splurge on a commercial-grade model just yet, so I bought the Cuisinart electric meat grinder.
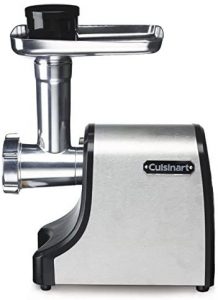
Cuisinart is a leading name in the kitchen appliance space, and the MG-100 grinder is yet another hit addition to the company’s massive range of products.
It is powered by a robust 300-watt motor that allows it to grind an impressive three pounds of meat per minute. It is crafted from stainless steel, and comes with two cutting plates for coarse and fine textures.
You also get two sausage attachments for making venison sausages, and a variety of other sausages. The Cuisinart electric meat grinder features a reverse function that unclogs the grinder head for smooth operation.
If you want to purchase a different model of meat grinder you can take a look at this article I have written on best meat grinder for venison/deer meat.
2. Digital food scale
With a digital food scale, I wanted to achieve two things with one device—weigh my meat and pack it accordingly such ground meat for 6 burgers, and get nutrition information.
The Greater Goods digital scale provides you with the weight of the meat, and also nutritional information right on its crisp and clear LCD display.

It also offers nutritional facts for over 2000 foods, and allows you to add 99 custom entries. The Greater Goods scale is designed to shutoff and calibrate automatically, and features touch-sensitive buttons that are easy to clean.
The top of the scale is fitted with durable tempered glass that can accommodate 11 lbs/5 kgs weight at a time. The bottom of the scale comes with non-slip scratch resistant feet, so it won’t damage your countertop.
3. Vacuum sealer
Even though you can use plastic wrap and freezer paper, a vacuum sealer is nice to have in your arsenal.
The Fresko food vacuum sealer offers one-touch operation, so all you need to do is insert the bag in the machine rather than pressing and releasing the lid.
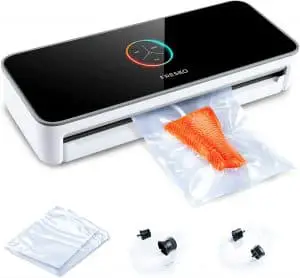
It features a luminous LED ring that indicates when the sealing process is complete, and a drip tray at the bottom that’s easy to clean.
The Fresko vacuum sealer comes with everything you need to get started including 20 vacuum sealer bags, two air suction hoses, and a detailed user guide.
Easy Steps on How to Grind Deer Meat
1. Field dressing
If you’ve hunter deer, the first, most important thing to do is field dress your kill. Field dressing simply means removing all the internal organs of the deer to help it cool, and prevents bacteria growth.
You have to field dress the deer in the field right after it dies, and doing so also makes the animal much lighter, as all the internal organs are removed.
Many hunters use axes or saws to field dress their kill, but you can also do it with a field dress kit such as the Gerber Moment.
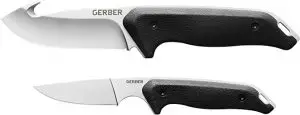
The Gerber Moment kit comes with two knives—one with a smaller blade for cutting along the deer leg bones, and other to make large cuts.
Both blades feature a glass bead finish, and a full tang construction for top notch durability.
To field dress, place the animal on its back, and use the knife to cut from the pelvis to the breastbone.
You can remove any cartilage that’s connecting the ribs to the breastbone, as doing so will make it easier to remove the organs.
Next, remove the genitals or mammary glands(female), but leave the scrotum for male deer, as some states require this for identification.
Now, you will have to make a cut around the anus, and tie the intestines to prevent leakage.
Other parts to cut are the membrane, diaphragm inside the body without puncturing any internal organs. Lastly, remove the excess tissue from the deer’s body cavity.
2. Processing the meat
Here you have two options—take the deer to a food processor in the area or process the different cuts of meat at home.
Since you’re going to be grinding deer meat at home, you can use your garage or kitchen countertop, but take note that either way will leave a mess.
Regardless of where you choose to grind deer, it is of utmost importance that the area is clean to avoid contaminating the meat.
3. Grinding the meat
You don’t have to grind the whole animal when you process it. In fact, I prefer to process the deer once I get home, and chill a major portion of it in my freezer.
- The best way to process deer meat is to use a sharp knife to cut two-inch cuts of the tough cuts of meat, vacuum seal, and set them flat in your freezer.
- You can transfer these packages to thaw in your fridge the night before grinding or cooking. By morning, they will be near defrosted, which is the ideal condition for grinding.
4. Grinding Deer Meat with a meat grinder
- Before you start grinding the meat, chill the meat not freeze along with the meat grinder parts such as the grinder auger, blade, plate and tray.
The reason you have to chill the meat and parts of the meat grinder is mostly due to temperature control. Friction is generated when the spinning grinder blade cuts the meat, resulting in heat that melts the fat, so what you get is a mushy texture.
- Your meat grinder probably came with a couple grinding plate, and which one to use depends on what you’re grinding the meat for.
If you’re grinding the meat to make sausages, use the fine grinding plate, but use the coarse ground plate if you’re grinding deer meat to make recipes such as chili.
- For huge chunks of meat, you can grind the meat twice—once with a large or medium plate, and finish with the fine plate.
When double grinding meat, it’s a good idea to put the meat back in the freeze in between grinds for roughly 10 minutes, so that it stays cold.
- Don’t forget to place a collection bowl filled with ice to keep the ground meat chilled under the grinder output.
5. Grinding deer meat without a grinder
Of course, a grinder will make this task a whole lot easier, but if you don’t have a meat grinder, there’s no need to break a sweat just yet, because here’s how to go about it!
- Grab the chilled meat from your refrigerator, and slice it at about ¼ inch thick.
- Next, flip the piece of meat over, and repeat step #1.
- Toss it over again, and cut it at 90-degrees, about ¼-inch between slices. Then flip it over and do the same for the other side.
- After you’ve done this to all the pieces of chilled meat, chop the meat with a cleaver from right to left, and repeat the process until you get the texture you need.
You can even use a food processor to grind deer meat, just as you would with a meat grinder, but you will not get great texture, due to the lack of grinding plates.
How to Store the Meat after Grinding?
Now that you’ve finished grinding or carving up your hunt for steaks, burgers, sausages, and jerky, you’re probably wondering how to store deer meat.
Assuming you’re properly vacuum sealed your deer cuts, you can store whole pieces of meat for three to five days in your refrigerator.
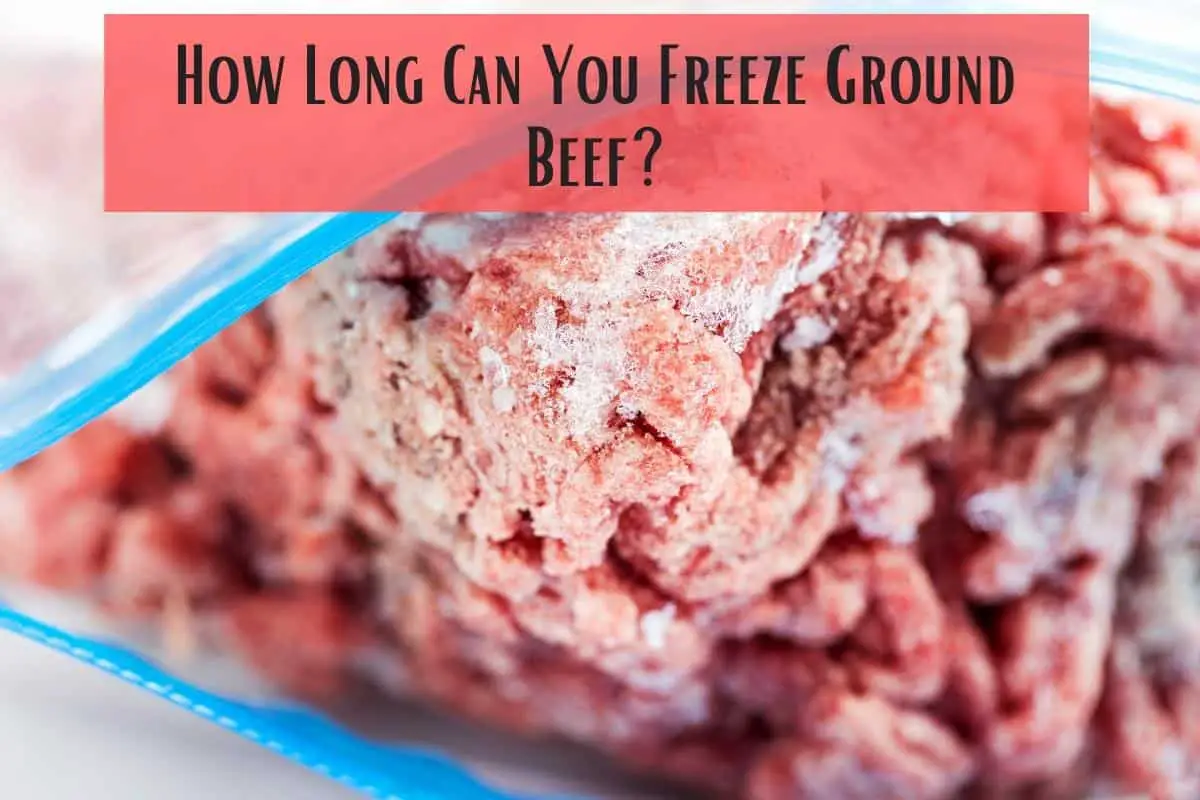
You can store these same cuts in your freezer for nine to twelve months, but some food enthusiasts claim that this can extend for up to two years.
For ground meat and sausages, you can store for up to two days in your fridge, and two to three months in a freezer.
Homemade smoked venison sausages can be can be stored for five to six months in your freezer, and up to three months in the refrigerator.
When storing venison meat in your freezer, always remember to defrost in your fridge for at least 12 hours before cooking.
Should You Add Fat to Ground Venison?
I choose not to add fat to my venison as a healthy option, but sometimes do at a ratio of 10 and 15 percent for burgers, and 20 percent or more for sausages.
It is also important to know the type of fat to use, where pork fatback is the most common, because it hardly gives the deer a pork flavor.
If you want the meat to taste more like pork and less like venison, you can fat that’s rich in fat such as pork belly.
Tips For Getting a Better Grind with Venison
- Whether you’re grinding deer meat or any other type of meat, it is important that both the grinder blade and plates are sharp, because dull blades and plates may not give you high quality, even results.
- If you want to season the meat to make specialty items such as chorizo, you should add the seasoning after you grind the meat the first time.
- You will want to add some fat, because deer meat has less of it such as bacon or pork butt.
- Grind the deer meat as soon as you remove it from the refrigerator rather than leaving over the countertop.
- If you’re grinding more than 10 lbs of deer meat, add some ice cubes to the mix every two pounds or so.
How to Package Ground Deer Meat?
There are several ways to properly package deer meat, most notably:
1. Vacuum seal
A vacuum seal void of air is my go-to way of packaging deer meat. When using a vacuum sealer, make sure you use good bags that are made from heavy-duty material, and seal well.
If the bags don’t seal the first time, add a double seal at the end of each package.
2. Zip-style freezer bags
Another great option to package wild game is with Ziploc bags. Don’t forget to remove the air from the bag before sealing, and label appropriately.
You can remove the air out of the bag by packing the bag with the meat, and submerging it into a bucket of water up to the zipper.